New World Scheduler supports Importing and Exporting data into a variety of common file formats.
We believe your congregation and person data is your own, and you should be able to Import and Export your data as you wish. We also believe that as true Christians, it is both reasonable and right to allow data exchange between other JW scheduling programs.
New World Scheduler can import the following from CSV file into New World Scheduler:
Note: If you are importing data from Majestic KHS, Hourglass app, Deckhand, CLM Explorer, Territory Helper, Alba or TSWin, please DO NOT use these instructions. Instead, please see:
CSV File Format
When importing any data into NW Scheduler from CSV files, please ensure the following:
- Ensure your CSV file is either comma , or semi-colon ; delimited
- Ensure your CSV file includes a HEADER row which describes the fields
- Ensure your CSV file is saved with the extension .csv
- Ensure your CSV file only contains Supported CSV Fields
- Ensure your CSV file is saved in Encoding UTF-8
Import Persons from CSV file into New World Scheduler
- Note: If you have not already done so, please Create a New Congregation
- Note: If the First name and Last name exactly match any existing person, the person will be merged. Otherwise a new person will be created.
- Carefully read and follow CSV File Format
- Open New World Scheduler
- Click Persons
- Click Import
- Click Persons
- Click from CSV file
- Follow the instructions, then click Import
- Your person data will now import
- Once the Import is completed, the Import Log will appear
- Please carefully check the Import Log, then click Save Import Log and Close
- Note: When you click Save Import Log, you will be asked where to save this file to. Select a location on your computer, e.g. Documents
- If there are any major problems, see Problems Importing CSV files
Sample Persons CSV
Supported Persons CSV Fields
- Name
- FirstName
- MiddleName
- LastName
- Suffix
- Address
- Email2
- PhoneHome
- PhoneMobile
- PhoneWork
- Gender
- FamilyHead
- FamilyID
- ElderlyInfirm
- Child
- Blind
- Deaf
- CustomInformation
- Notes
- GroupName
- GroupID
- GroupResponsibility (either Overseer or Assistant)
- Privilege (either Elder, MS or UBP)
- PioneerStatus (either AP, RP or SP)
- RPNumber
- Anointed
- LDCVolunteer
- KingdomHallKey
- CLMStudent
- AllowedHall
- Disfellowshipped
- DOB
- DateOfBirth
- DateOfBaptism
- DateOfDPA
- DateOfRP
- DateOfDisfellowshipped
- DateOfFirstMonth
- UseForChairman
- UseForAuxiliaryCounselor
- UseForPrayers
- UseForTreasuresTalk
- UseForTreasuresGems
- UseForTreasuresBR
- UseForApplyIC
- UseForApplyRV
- UseForApplyBS
- UseForApplyExplaining
- UseForApplyStudentTalk
- UseForApplyAssistant
- UseForLivingParts
- UseForCBS
- UseForCBSReader
- UseForPublicTalksLocal
- UseForPublicTalksAway
- PublicTalksCanGive
- UseForWeekendChairman
- UseForWatchtowerReader
- UseForCustomPublicTalksLocal1
- UseForCustomPublicTalksLocal2
- UseForHospitality
- UseForPublicWitnessing
- UseForConductFSGroups
- UseForCustomFS
- UseForFSPrayers
- UseForDuty1
- UseForDuty2
- UseForDuty3
- UseForDuty4
- UseForDuty5
- UseForDuty6
- UseForDuty7
- UseForDuty8
- UseForMaintenance
- UseForCleaningType1
- UseForCleaningType2
- UseForCleaningType3
- UseForCleaningType4
- UseForGardenCareType1
- UseForGardenCareType2
Import Emergency Contacts from CSV file into NW Scheduler
- Note: If you have not already done so, please Create a New Congregation
- Note: If the First name and Last name exactly match any existing emergency contact, the emergency contact will be merged. Otherwise a new emergency contact will be created.
- Note: Either the PublisherID field must match an existing publisher ID, OR the PublisherFirstName and PublisherLastName must exactly match an existing publisher, otherwise the emergency contact will not be imported.
- Carefully read and follow CSV File Format
- See Sample Emergency Contacts CSV
- See Supported Emergency Contacts CSV Fields below
- Open New World Scheduler
- Click Congregation
- Click Import or Export
- Under Import, click Emergency Contacts
- Click from CSV file
- Follow the instructions, then click Import
- Your emergency contact data will now import
- Once the Import is completed, the Import Log will appear
- Please carefully check the Import Log, then click Save Import Log and Close
- Note: When you click Save Import Log, you will be asked where to save this file to. Select a location on your computer, e.g. Documents
- If there are any major problems, see Problems Importing CSV files
Sample Emergency Contacts CSV


Supported Emergency Contacts CSV Fields
- PublisherID
- PublisherFirstName
- PublisherLastName
- ID
- CongregationPersonID
- Order
- Name
- Address
- Mobile
- Phone
- Relationship
- Notes
Import Field Service data from CSV file into New World Scheduler
- Note: If you have not already done so, please Create a New Congregation
- Note: The First name and Last name must exactly match an existing person in your congregation, or the Field Service data will not be imported.
- Carefully read and follow CSV File Format
- Open New World Scheduler
- Click Congregation > Congregation Field Service Report
- Select the correct month you wish to import data for
- Click Publishers
- Click Import and confirm your choice
- Locate your CSV file and click Open
- Your data will now import
- Once the Import is completed, the Import Log will appear
- Please carefully check the Import Log, then click Save Import Log and Close
- Note: When you click Save Import Log, you will be asked where to save this file to. Select a location on your computer, e.g. Documents
- If there are any major problems, see Problems Importing CSV files
Sample Field Service data CSV


Supported Field Service data CSV Fields
When importing Field Service data in CSV format, the follow fields are required and must exactly match an existing person in New World Scheduler:
- FirstName and LastName, OR
- PersonID
- Date (Format must be yyyy-MM, e.g. 2023-05)
The follow fields are optional and describe the field service data for that person, for the selected month:
- SharedInMinistry (true or false)
- BibleStudies (number)
- AP (true or false)
- Hours (number, may include decimal points)
- Credit (number)
- Remarks (text)
No other CSV fields are supported.
Import Neighbour Congregations from CSV file into New World Scheduler
- Note: If you have not already done so, please Create a New Congregation
- Note: If the congregation name exactly matches an existing congregation, the data will be merged. Otherwise a new congregation will be created.
- Carefully read and follow CSV File Format
- See Sample Neighbour Congregations CSV below
- See Supported Neighbour Congregations CSV Fields below
- Open New World Scheduler
- Click Congregation > Circuits, Congregations & Public Speakers
- Click Import
- Under Neighbor Congregations, click from CSV file
- Locate your CSV file and click Open
- Your data will now import
- Once the Import is completed, the Import Log will appear
- Please carefully check the Import Log, then click Save Import Log and Close
- Note: When you click Save Import Log, you will be asked where to save this file to. Select a location on your computer, e.g. Documents
- If there are any major problems, see Problems Importing CSV files
Sample Neighbour Congregations CSV


Supported Neighbour Congregations CSV Fields
- Name
- Circuit
- KingdomHallAddress
- WeekendMeetingDay
- WeekendMeetingTime
- COBEFirstName
- COBELastName
- COBEPhone
- COBEEmail
- PTCFirstName
- PTCLastName
- PTCPhone
- PTCEmail
- Notes
Import Public Speakers from CSV file into New World Scheduler
- Note: If you have not already done so, please Create a New Congregation
- Note: If the First name and Last name exactly match an existing Public Speaker, the data will be merged. Otherwise a new Public Speaker will be created.
- Carefully read and follow CSV File Format
- Open New World Scheduler
- Click Congregation > Neighbor Congregations and Public Speakers
- Select the Congregation you wish to import the Public Speakers into
- Under Public Speakers, click Import
- Locate your CSV file and click Open
- Your data will now import
- Once the Import is completed, the Import Log will appear
- Please carefully check the Import Log, then click Save Import Log and Close
- Note: When you click Save Import Log, you will be asked where to save this file to. Select a location on your computer, e.g. Documents
- If there are any major problems, see Problems Importing CSV files
Sample Public Speakers CSV

Supported Public Speakers CSV Fields
- Congregation
- FirstName
- LastName
- Privilege (either E or MS)
- PhoneHome
- PhoneMobile
- PublicTalksCanGive (numbers separated by commas)
- PublicNotes
- AwayFrequencyPeriod (a number)
- AwayFrequencyType (either 0 for weeks or 1 for calendar months)
Import Public Talk Schedule from CSV file into New World Scheduler
- Note: If you have not already done so, please Create a New Congregation
- Note: If the First name and Last name exactly match an existing Public Speaker, this speaker will be used. Otherwise a new Public Speaker will be created.
- Carefully read and follow CSV File Format
- Open New World Scheduler
- Click Congregation > Import and Export
- Under Import, click Public Talk Schedule
- Click from CSV file and set your Date Format
- Note: This must exactly match your CSV file dates
- Locate your CSV file and click Open
- Your data will now import
- Once the Import is completed, the Import Log will appear
- Please carefully check the Import Log, then click Save Import Log and Close
- Note: When you click Save Import Log, you will be asked where to save this file to. Select a location on your computer, e.g. Documents
- If there are any major problems, see Problems Importing CSV files
Sample Public Talk Schedule CSV


Supported Public Talk Schedule CSV Fields
- Date
- Congregation
- PublicSpeaker
- OutlineNumber
- OutlineName
- Song
- Confirmed
- AvailableForHospitality
- Notes
- Chairman
- WatchtowerReader
- CustomWeekendAssignment1
- CustomWeekendAssignment2
- Note: For Weekend Assignments, the Display Name must exactly match an existing Person, or no assignment will be imported.
Import Life and Ministry Meeting Schedule from CSV file into New World Scheduler
- Note: If you have not already done so, please Create a New Congregation
- Note: If the First name and Last name exactly match an existing Person, or no CLM Assignment will be imported.
- Carefully read and follow CSV File Format
- Note: We recommend first creating a sample CLM schedule, then Exporting it to CSV to see all the supported CSV field.
- Open New World Scheduler
- Click Congregation > Import and Export
- Under Import, click Life and Ministry Meeting Schedule
- Click from CSV file and set your Date Format
- Note: This must exactly match your CSV file dates
- Locate your CSV file and click Open
- Your data will now import
- Once the Import is completed, the Import Log will appear
- Please carefully check the Import Log, then click Save Import Log and Close
- Note: When you click Save Import Log, you will be asked where to save this file to. Select a location on your computer, e.g. Documents
- If there are any major problems, see Problems Importing CSV files
Supported Life and Ministry Meeting CSV Fields
- Date
- Schedule
- Person
- PartType
- Assignment
- School
Import Maintenance Categories from CSV file
- Carefully read and follow CSV File Format
- Open New World Scheduler
- Click Congregation > Import and Export
- Under Import, click Maintenance
- Click Categories from CSV file
- Locate your CSV file and click Open
- Your data will now import
- Once the Import is completed, the Import Log will appear
- Please carefully check the Import Log, then click Save Import Log and Close
- Note: When you click Save Import Log, you will be asked where to save this file to. Select a location on your computer, e.g. Documents
- If there are any major problems, see Problems Importing CSV files
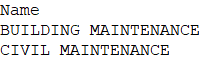
Sample Maintenance Categories CSV
Supported Maintenance Categories CSV Fields
- Name
Import Maintenance Tasks from CSV file
- Carefully read and follow CSV File Format
- Open New World Scheduler
- Click Congregation > Import and Export
- Under Import, click Maintenance
- Click Tasks from CSV file
- Locate your CSV file and click Open
- Your data will now import
- Once the Import is completed, the Import Log will appear
- Please carefully check the Import Log, then click Save Import Log and Close
- Note: When you click Save Import Log, you will be asked where to save this file to. Select a location on your computer, e.g. Documents
- If there are any major problems, see Problems Importing CSV files
Sample Maintenance Tasks CSV

Supported Maintenance Tasks CSV Fields
- Name
- Category
- Link
- Description
- DatesCompletedString
- Note: Must be in format of yyyyMM separated by |
Import Assignments from CSV file
- Carefully read and follow CSV File Format
- Open New World Scheduler
- Click Congregation > Import and Export
- Under Import, click Maintenance
- Click Assignments from CSV file
- Locate your CSV file and click Open
- Your data will now import
- Once the Import is completed, the Import Log will appear
- Please carefully check the Import Log, then click Save Import Log and Close
- Note: When you click Save Import Log, you will be asked where to save this file to. Select a location on your computer, e.g. Documents
- If there are any major problems, see Problems Importing CSV files
Sample Maintenance Assignments CSV

Supported Maintenance Assignments CSV Fields
- Date
- Note: Must be in the format of yyyyMM
- Congregation
- Name
- AssignTo
- Note: Must be either Person, FieldServiceGroup, OtherGroup or NeighborCongregation
- Type
- Note: Must be either MaintenanceTaskU1, MaintenanceTaskU2, MaintenanceTaskU3 or MaintenanceTaskU4
- MaintenanceTaskName
- MaintenanceTaskCategory
- Completed
- Note: Must be True or False
Problems Importing CSV files
If you have problems Importing from CSV:
- Ensure your CSV file is comma , or semi-colon ; delimited
- Ensure your CSV file includes a HEADER row which describes the fields
- Ensure your CSV file is saved with the extension .csv
- Ensure your CSV file only contains Supported CSV Fields
- Ensure your CSV file is saved in Encoding UTF-8
- Carefully read and check Other Import Problems
- If you have done all of the above and still have problems, please Contact Us for assistance. Please include a copy of the CSV file and screenshots of ALL the steps you are performing, and any errors you see.
- IMPORTANT: You must include a copy of your CSV file and screenshots of each step you are performing, and any errors you see. If you are unwilling or unable to do this, please do not contact us.
Additional Help
Import Data
- Import Congregation and ALL data
- Import Persons
- Import Field Service Data
- Import Life and Ministry Meeting Schedule (CLM)
- Import Public Speakers and Public Talks
- Import Territories and Territory Assignment Records
- Import Problems
Import from Program or Source
- Import from Majestic KHS
- Import from Hourglass
- Import from TSWin
- Import from Ta1ks
- Import from Deckhand
- Import from Territory Helper
- Import from Territory Assistant
- Import from Online Territory Manager OTM
- Import from Alba
- Import from Google
- Import from CLM Explorer
- Import from CSV file
- Import from New World Scheduler file
Export Data